


Share your craft projects
Make new craft buddies
Ask craft questions
Blog your craft journey
Blog Series
Monthly Book Giveaway

Part 4: January 2023
There have been record-breaking 314 projects posted in December. Congrats to Bentlyj for winning the One-Plank Woodworking Projects by Andy Standin...
.png)
Part 5: February 2023
There have been 260 new projects posted in January. Congrats to JimJakosh for winning the Foundations of Woodworking: Essential joinery techniques ...
Part 6: March 2023
There have been 145 new projects posted in February. Congrats to Madburg for winning the Woodworking: The Complete Step-by-Step Manual by DK in our...
Flip-Top Cart
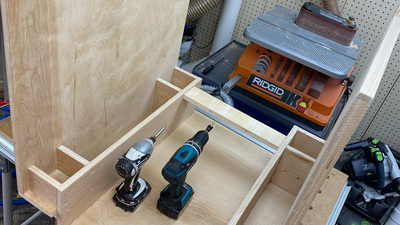
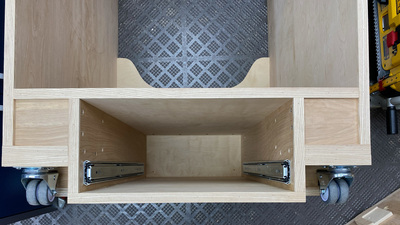
Part 6: Reclaiming Storage Space in the Base
Due to the base construction, there is now a pair of enclosed compartments in the base which I wanted to be able to access. There were two ways th...
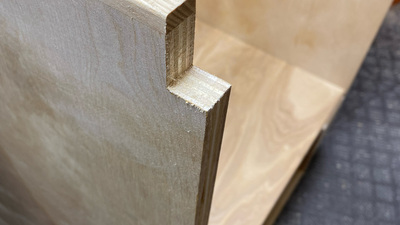
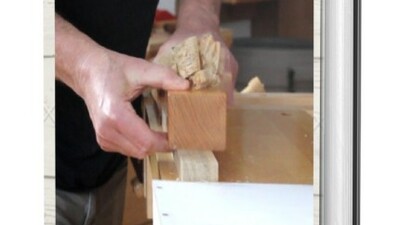
Part 7: Some final fitting
There were just a few things left to complete on the cart before I could get some finish on it.
Each top corner on the sides received a notch to a...
Wegner inspired dining chair series

Part 4: Much more prototyping
Summer is over and work, my business and life in gerneral have taken almost all my time. And my chair project have slowed down considerable. But in...
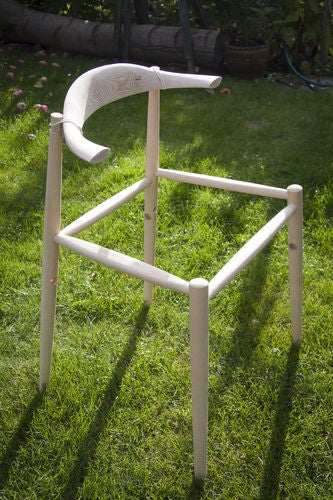
Part 5: Seat weaving and finishing up
Last time we ended up here:
[Image]
In the mean time i have been busy researching on methods of weaving seats. Lots of designs to consider... B...

Part 6: And then the final, real chairs
This whole series have all the time evolved around making a set of dining chairs out of two large slabs of European elm that was saved at my mother...
Giraffe Bookcase
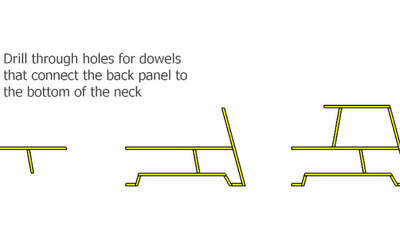
Part 7: Gluing the Case
The glue-up part of a project is always nerve-wracking for me, and this project was no exception. Dowel joinery helps a lot, but it doesn't totall...

Part 8: Attaching the Legs
The final woodworking step was attaching the legs to the case.
As with everything else, I used dowels. The front legs were straightforward. I used...

Celtic Mandolin

Part 11: Started the mandolin design
Started design on QCad. [40098C9E-87A0-4304-9D8E-8F575AAD49E1.jpeg]Neck and head design. Started thinking about the cutting sequence for the neck.
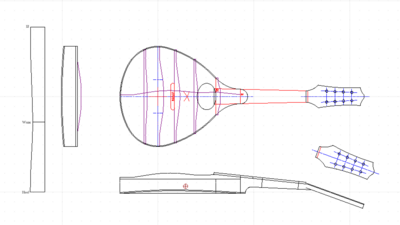
Part 12: Almost finished with the overall design
Almost finished with the overall design. Need to verify the tuner spacing when I get them. Then I'll start cutting templates with the laser.
[Scree...
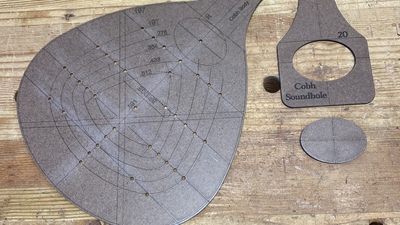
Part 13: Some Templates
Fired up the laser to cut out the first templates for the mandolin today. The body template determines the overall shape of the body, the drill loc...
Danish Cord Bench
Part 4: Shaping, Sanding, and Glue-up
The leg edges and leg stretchers received a fingernail profile. This was done with a 1/2" radius roundover bit in the router table. Note my slig...

Part 5: Weaving the Warp
Once I completed the final sanding and prepped according to instructions, I applied Rubio's Monocote Pure to the frame. It was my first experience...
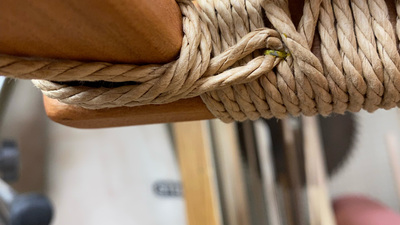
Part 6: Weaving the Weft and Done
The weft weaving starts in one corner, attaching the a doubled cord (roughly 120ft length folded in half) at its center onto a side rail. This is ...
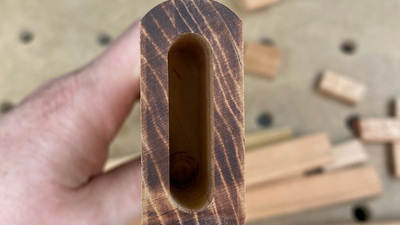
Coping/Turning Saw
Part 3: Fit the handles to the frame
Work out what angle the handles should go in at. Not quite 90 degrees because of the slight curve from crossbar to where the handles go.
[20210104_...
French Country Table
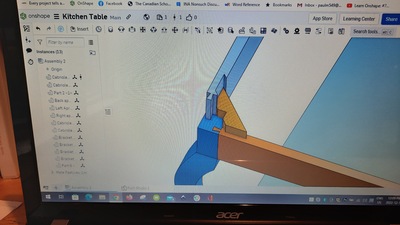
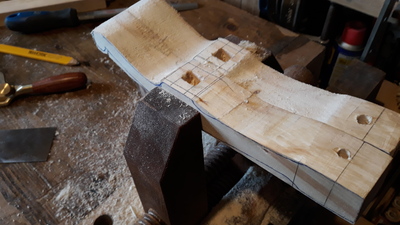
Part 1: Designing and Joinery
This year’s winter project is a new kitchen table. The beater we have is having trouble living next to the new dog food cabinet beside it.
Our whol...
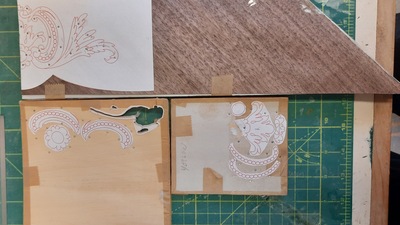
Part 2: Veneering the Base
Well, I said I would post again when the veneering was done. It took a little longer than I expected because I decided to add a little marquetry to...
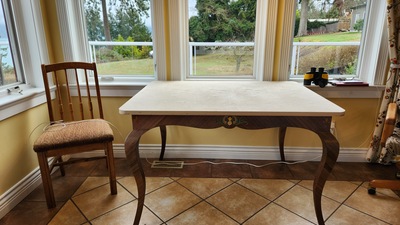
Part 3: Done for Now
Just a quick update to show the top in place and the installation in the kitchen by the 18C dog food cabinet. It will live here under a tablecloth ...
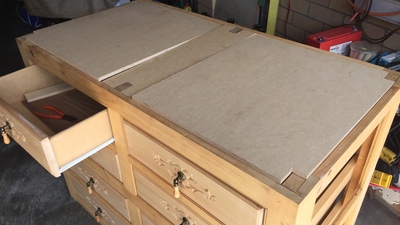
8 Drawer Beaded Face Frame Cupboard Construction
Part 6: BFFC Day 6
this blog has been a few days to completion mainly due to too hot outside or other Higher priority tasks overtaking it
I carved all the drawer fro...
Part 7: BFFC Day 7
Well most of the progress has slowed somewhat.
First up :- My custom trolley as promised. (Edit opps cannot find the pictures just now!)
Its for ...
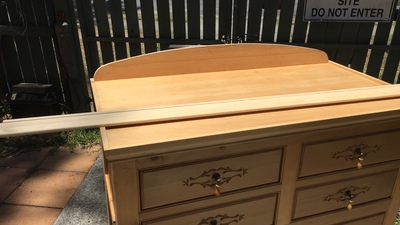
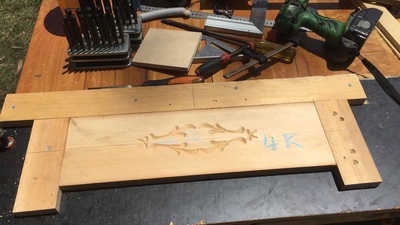
Part 8: The double radius trim to complete the BFFC
You may have seen the preparation involved to construct the Double radius feature at the back of the cabinet top.
Here it is sitting in place.
[IMG...
Wooden Model Making
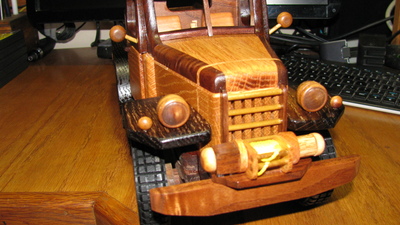
Part 1: Power Wagon
When I first saw the Power Wagon I just knew that some time or other I would be giving it a try.
[IMG_3611.JPG]
[IMG_3613.JPG][IMG_3614.JPG]
[T&...
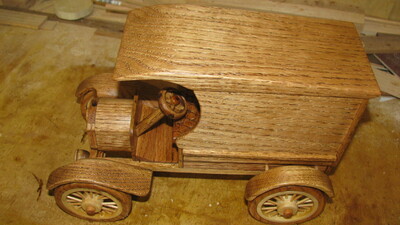
Part 2: 1911 Delivery Truck
1911 delivery truck
I found some cool old plans to play with so trying the 1911 Brush Delivery Truck'
I've built this style truck before but a m...